(Scroll down for the English recipe)
Bueno, bueno, bueno....
Pues sí, mira que he hecho rositas de fondant, pero nunca he puesto un tutorial sobre ellas. Las he hecho superfáciles y también superdifíciles. Todas quedan preciosas porque las rosas son preciosas de por sí.
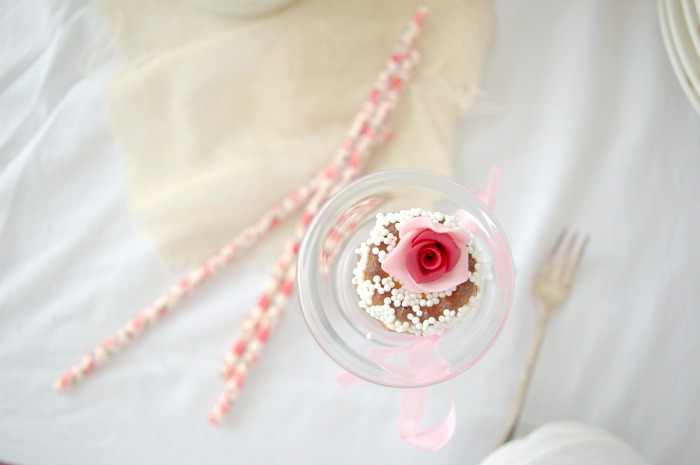
Hoy os traigo un mini tutorial de rositas de fondant, pequeñas, para adornar cupcakes, cake pops, galletas, y cualquier pastelillo de pequeño tamaño y que permita de adorno una rosa. Para decorar tartas también las puedes utilizar pero, o tendrías que hacer muchas, o las combinas con otras flores.
Nosotros las hemos hecho para decorar unos deliciosos canelés de Bordeaux que hemos hecho para nuestro reto de Una Galleta, un Cuento y que trataba de La Bella y la Bestia. Os dejo el enlace para que veáis qué maravilla. Pinchad en la foto para verlo.
Venga, ¡vamos a ello que es muy sencillo!
ROSITAS SENCILLAS CON FONDANT
(Basado en el de Patricia Arribálzaga)
Materiales y utensilios:
Fondant blanco
Colorante alimentario Wilton, colores: rosa, rojo y burgundy
Rodillo para fondant
Cortador redondo de 1.5 cm de diámetro (nos sirve también una boquilla)
Alfombrilla para flores
Bolillo redondo grande
Cutter
Preparación:
Dividimos el fondant en dos partes. Una la teñimos con un poco de rosa para que nos quede clarito, como el de la foto. La otra parte la teñimos de rojo y luego le añadimos un poco de burgundy para que le dé ese tono más oscuro. Recordad que cuando tiñamos, debemos hacerlo con poca cantidad, poco a poco. Lo poco tiene arreglo, lo mucho ya no.
Estiramos la masa con burgundy y cortamos 3 círculos.
Con un bolillo grande y encima de la alfombrilla, afinamos los bordes suavemente.
Entre nuestros dedos, cogemos uno de los círculos y hacemos un rollito, como se ve en la foto.
Cogemos otros de los círculos y lo ponemos que coincida la mitad del círculo con el cierre del rollito. Apretamos un poco los laterales para que se pegue.
Ponemos el otro círculo, abrazando al anterior, justo en frente.
Modelamos un poco con las yemas de los dedos, los bordes de los pétalos.
Estiramos ahora la masa rosa y cortamos 3 círculos.
Volvemos a darles con el bolillo por los filos.
Ponemos uno de los círculos rosa que coincida el centro con la unión de los rojos.
Ponemos otro círculo rosa al lado del anterior y el tercero terminando de hacer el círculo completo y abrazando a los otros dos.
Voleamos un poco los bordes, dándoles movimiento con la yema de los dedos.
Cortamos con un cutter el rabo que nos queda de la rosa para dejarle la base plana.
Listo.
Si alguna vez tenéis que hacer muchas rosas, recordad que se pueden guardar perfectamente en un recipiente hermético (fiambrera, por ejemplo)apoyadas sobre papel suave de cocina o algodón de relleno de almohadas y cojines, guata,... Podéis tener siempre algunas hechas para decorar en caso de imprevistos.
Bueno, espero que os haya gustado y que volváis a por más tutoriales sobre fondant y más recetas estupendas. Os dejo el anterior tutorial, también de flores de fondant muy, muy sencillas. ¡Seguro que os gusta!
Cómo hacer flores sencillas de fondant
Y si os gustamos, no os perdáis todas nuestras recetas día a día, actualizadas en nuestra página de Facebook. Siempre seréis bienvenidos.
FONDANT LITTLE ROSES
(Based on Patricia Arribálzagas tutorial)
Tools and materials:
White fondant
Food coloring in gel Wilton pink, red and burgundy
Big ball tool
Decorating tip or cutter, 1.5cm-diameter
Foam mat for making gum paste flowers
Rolling pin
Cutter
Directions:
Take some fondant and divide it into two parts.
Color one of them with some pink food coloring. Take only a bit until you get the desired color. Knead well.
Color the remaining fondant in red and later, add some burgundy food coloring until you get a dark red-pink color. Knead well.
Spread the red-pink fondant with the rolling pin and cut into 3 discs.
Place them in the foam mat and smooth the edges with the big ball tool.
Take one discs and roll between your finger tips as you can see in the picture.
Take another disc and place the middle of it over the junction of the first disc. Press a bit so it sticks.
Place the other disc in fornt of the later one.
Add some movement to the edges using your finger tips.
Spread on the pink fondant with the rolling pin and cut into 3 discs.
Place them over the foam mat and smooth the edges with the big ball tool.
Place the center of one of the pink discs over the junction of the red one.
Place another pink discs besides and the third one joining the first and the second one.
Give some movement to the edges with your finger tips.
Cut the end of the rose with a cutter, so the base is flat.
Ready to use!!
I hope you like it and you use it in your creations.


